Who doesn't love chocolate? It's that sweet, creamy delight that can brighten up even the gloomiest of days. But have you ever wondered about the magic behind artisanal chocolate—the kind that makes your taste buds dance with joy? Well, guess what? You can make it at home, and it's not as complicated as you think.
In this guide, we will take you on a chocolate-making adventure. We'll keep things simple, with no fancy jargon and lots of details, to ensure you get the perfect homemade artisanal chocolate. So, grab your apron, and let's get started!
Ingredients You'll Need
Let's start with the basics. To make artisanal chocolate at home, you'll need just a handful of ingredients:
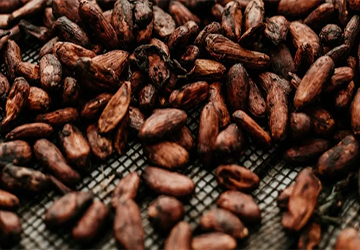
· Cocoa Beans: The star of the show. You can buy whole cocoa beans or cocoa nibs (beans with the shell removed).
· Sugar: To sweeten your chocolate. You can use regular granulated sugar or explore alternatives like coconut sugar, maple syrup, or honey.
· Cocoa Butter: This is the fat extracted from cocoa beans. It gives chocolate its smooth texture. You can find cocoa butter online or at specialty stores.
· Optional Flavors: Get creative with add-ins like vanilla extract, sea salt, or chili powder for a kick!
Tools You'll Need
Now, let's talk about the tools you'll need. Don't worry; you don't need a professional chocolate-making setup. Here's what you'll use:
Cocoa Bean Roaster: If you start with whole beans, you'll need a roaster. But you can also use your oven!
Cracker and Winnowing Set: This is for removing the outer shell from cocoa beans. You can also use your hands and a little patience.
Grinder: To turn roasted cocoa nibs into a smooth paste. A food processor or high-quality blender will work, too.
Conche (optional): A machine used to refine chocolate for hours. If you don't have one, don't worry; you can use your grinder or food processor.
Chocolate Mold: To give your chocolate its shape.
Double Boiler: For melting cocoa butter and mixing it with cocoa paste.
Thermometer: To keep an eye on the chocolate's temperature.

Step 1: Roasting Your Cocoa Beans
The journey to perfect artisanal chocolate begins with roasting your cocoa beans. This step is essential as it brings out the chocolatey flavors we all know and love. If you have one, you can burn your beans using an oven, a stovetop, or even a dedicated cocoa bean roaster.
Roasting in the Oven
1. Preheat your oven to 250°F (120°C).
2. Spread your cocoa beans evenly on a baking sheet. If you use an oven, ensure they're in a single layer.
3. Roast the beans for 30-40 minutes, checking and stirring them occasionally. You'll know they're done when they emit a rich, chocolatey aroma.
4. Let the beans cool, then crack them to remove the outer shell. This can be a bit time-consuming, but it's worth it for that fresh cocoa flavor.
Step 2: Grinding Your Cocoa Nibs
Now that you have roasted and cracked cocoa nibs, it's time to turn them into a paste. This step is where the magic happens.
Place your cocoa nibs in a grinder or food processor. Grind until you achieve a smooth, thick paste. This may take some time, so be patient. You can stop and scrape down the sides to ensure an even texture.
Step 3: Melting Cocoa Butter
Cocoa butter is what gives chocolate its creamy texture. It's time to melt it and combine it with your cocoa paste.
Chop your cocoa butter into small pieces for easy melting. Create a double boiler by placing a heatproof bowl over a pot of simmering water. Make sure the bowl doesn't touch the water. Add cocoa butter to the bowl and melt it gently, stirring until completely smooth.
Step 4: Mixing Cocoa Butter and Cocoa Paste
It's time to combine the melted cocoa butter with your cocoa paste. This is where you can get creative with flavors by adding optional ingredients like vanilla extract or sea salt.
Pour the melted cocoa butter into the cocoa paste. Stir well until everything is thoroughly combined. This mixture is called "chocolate liquor" despite not containing any alcohol.

Step 5: Tempering Your Chocolate (Optional)
Tempering is a process of heating and cooling chocolate to give it a glossy finish and a satisfying snap when you break it. It's optional, but it makes your chocolate look more professional.
Heat your chocolate liquor to around 115°F (46°C). Use a thermometer to monitor the temperature. Cool it down by pouring a third onto a marble or granite surface and spreading it with a spatula.
Keep spreading and scraping until it cools to around 80°F (27°C). Add the cooled chocolate back to the warm chocolate liquor and stir well. Your chocolate is now tempered and ready for molding.
Step 6: Molding Your Chocolate
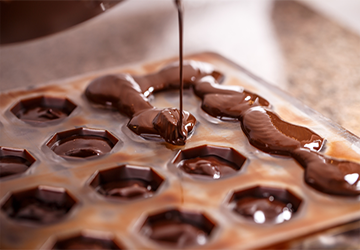
It's time to give your chocolate its final shape! You can use silicone molds, traditional chocolate molds, or a lined baking sheet.
1. Pour your tempered chocolate into the molds.
2. Tap the molds gently to remove air bubbles.
3. Let your chocolate cool at room temperature for a while, and then transfer it to the fridge to set it completely. This can take a few hours.
Step 7: Unmolding and Enjoying!
Once your chocolate has set, it's time to unmold and indulge in your homemade artisanal treat.
Gently pop your chocolate out of the molds. Using a baking sheet, you can break it into rustic pieces. Store your chocolate in a cool, dry place. It's best enjoyed within a few weeks, but if you can resist, it can last longer.
Tips and Tricks
The following tips and tricks will surely help you throughout the process:
Experiment with flavors: Add crushed nuts, dried fruits, or a touch of your favorite spice to make your chocolate unique.
Quality matters: Use the best quality cocoa beans and cocoa butter for the best flavor.
Patience is vital: Chocolate-making takes time and practice. Don't be discouraged if your first batch isn't perfect—it's all part of the learning process.
Conclusion
There you have it—a step-by-step guide to making artisanal chocolate at home. It's a fun and rewarding process that allows you to customize your chocolate to your heart's desire. So, get creative, experiment with flavors, and enjoy the sweet results of your labor. Happy chocolate making!


